Guides
How to Build an Incident Report Generator in Notion
Build an incident report generator in Notion with clear database fields, a reusable template, and PDFOutput automation for PDF and document files.
By Sanat Biswal · 2026-10-05 · 10 min read

{/ synced-from-notion — do not edit manually /}
When an incident happens, the facts can end up scattered across notes, forms, and team messages. An incident report generator in Notion gives your team one place to capture those details, then turn each record into a consistent document.
Set up the database first, shape the report around your process, then connect the fields to a PDFOutput template. You’ll be able to create a report when a record is ready, rather than retyping it into a fresh document.
Step 1: Decide Which Incidents to Track and What Each Report Needs
Start by defining what counts as an incident for your team. A school may track injuries or property damage. A manufacturing team may log equipment failures and near misses. Keep the scope clear so staff know which events belong in the database.
Next, list the details your report needs. A useful starting set is the date and time, site or location, incident type, people involved, and a plain account of what happened. Add the severity level and current status if they guide who reviews the record or what happens next.
For teams that manage hazards or workplace events, safety inspection PDF automation in Notion can also help shape a related reporting workflow. Keep the incident report focused on the event itself, though. A long list of fields can slow down entry and lead staff to skip details.
Plan the investigation and follow-up fields, too. Capture immediate steps taken, possible contributing factors, a root cause when known, and corrective actions. Give each action an owner and due date so the report can support follow-through, not only record what happened.
A practical incident report template can include incident categories, detailed input fields, and follow-up actions. Use these as a checklist, then remove fields that don’t fit your own process.

Keep the first version short enough to fill out during a busy shift. You can add fields later if reviews show a real need. The goal is a complete account based on facts, not a form so long that people put off using it.
Step 2: Create the Incident Database and Prepare a Report Template
Create a Notion database with one row for each incident. Give each record a clear title, such as an incident ID or short event label. Then add a property for each detail you decided to track. Use date properties for dates, select or status properties for categories, and text fields for descriptions and investigation notes.
Keep internal tracking fields separate from the final report content. For example, a review status can help managers sort open records without appearing in the document. Fields such as event date, location, summary, impact, and corrective action may belong in both places.
Now prepare the document that people will receive or file. PDFOutput accepts a Google Document, editable document, PDF file, or Notion page as a template. A familiar document layout works well when your team needs a document that’s easy to use. A fixed PDF can suit a form with an approved design.
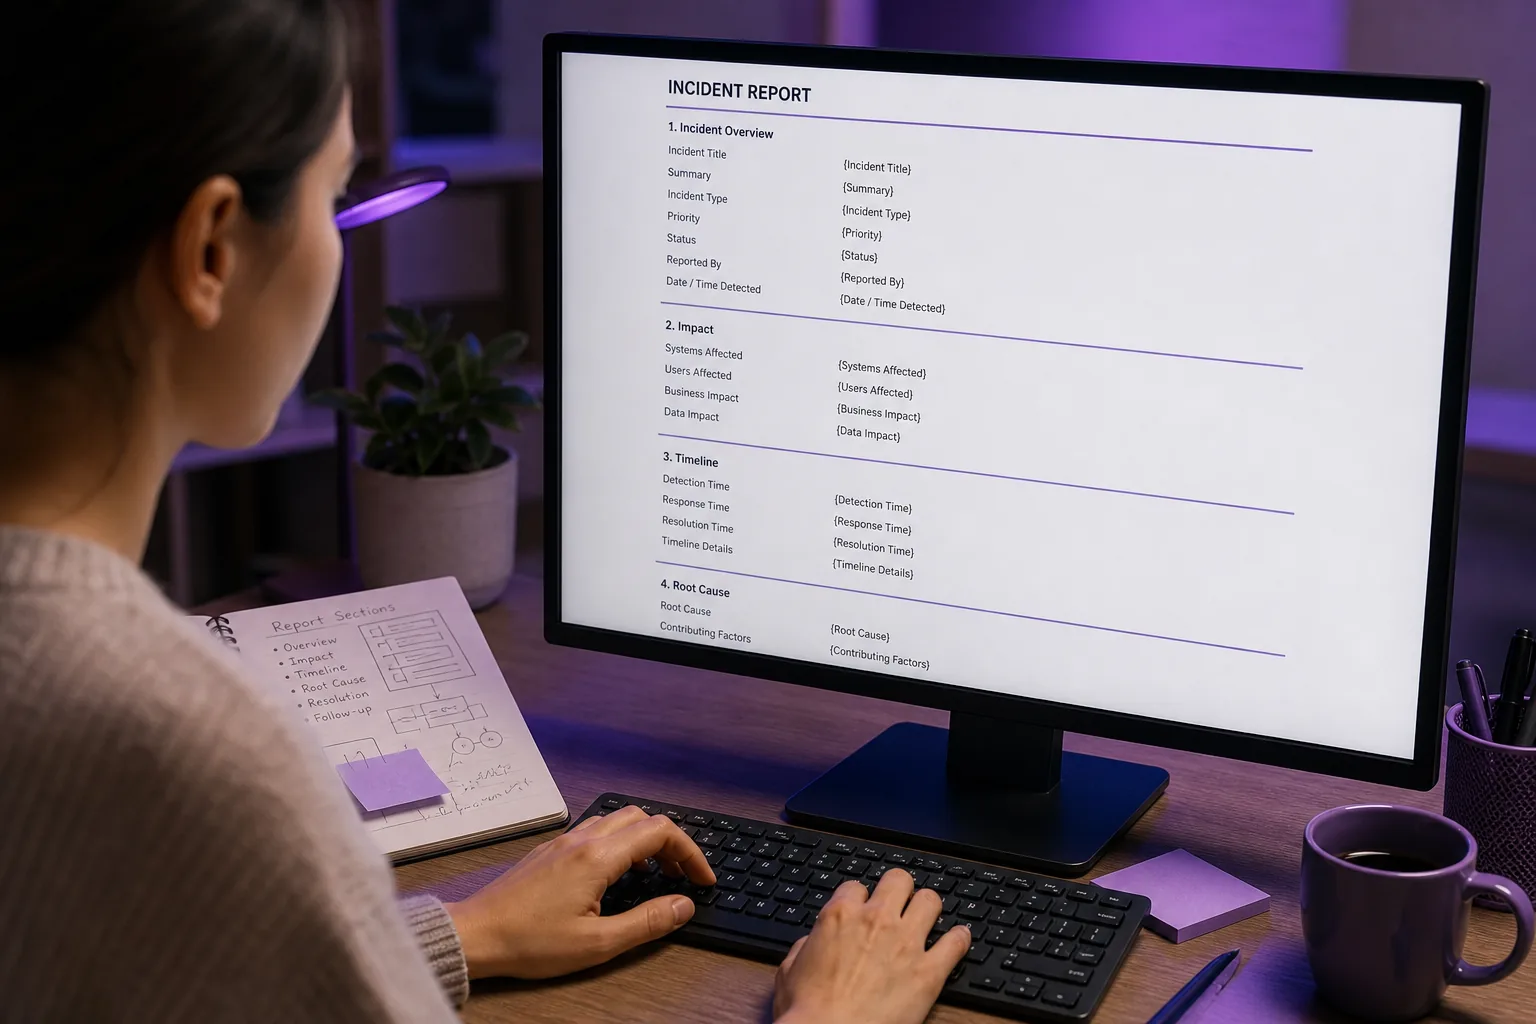
Build the report in the order a reader needs the information. Start with the incident ID and event details. Follow with the summary, timeline, immediate response, investigation notes, and assigned actions. Add a place for approval or sign-off if your process requires one.
Think through how different users will read the report. A supervisor may need the full investigation. A team member assigned an action may need the task and due date at a glance. Clear headings and enough space for longer notes make the same report easier to review.
> 💡 Pro Tip: Use one template for each distinct report type when the sections differ. Don’t make a single form cover unrelated incident processes.
Step 3: Connect the Template to PDFOutput and Map the Incident Fields
Connect the Notion database and report template in PDFOutput. The template uses placeholders in double curly braces, such as {{Incident_ID}} or {{Event_Date}}. Each placeholder needs to match the related Notion database property name.
Place a placeholder wherever that field should appear in the document. For example, put {{Location}} beneath the report heading, then add {{Incident_Summary}} in the event section. Use the exact property name, including spaces, underscores, and capitalization.
PDFOutput maps matching placeholders to Notion values and replaces them when it generates the document. It can use data from related databases through Notion relations and rollups, which are links between records and values drawn from those linked records. For example, a site record can supply a location name to an incident report. See how field service reports map Notion fields to document templates for a related record-to-document workflow.
Choose how the finished file should be stored. PDFOutput can save generated documents to a selected Google Drive folder and place the file back in a database property. That gives the team a link from the incident record to its report, instead of leaving the document detached from its source data.
Before you activate the workflow, review the fields you’ve mapped. A missing placeholder can leave an important section blank. A misspelled property name can stop the value from appearing where you expect it. Preview a record with realistic notes and check the whole output, including page breaks and long text.
PDFOutput can generate PDFs and Google Docs, as well as PPTX files. For an incident workflow, choose the output your reviewer needs. A PDF can be useful for a fixed, shareable record. An editable document may fit a review process where staff need to make changes.
Step 4: Set Up Notion Triggers for Incident Report Generation
Choose how staff will start document generation. PDFOutput can use a button in the Notion database for on-demand reports. That suits a process where a supervisor checks the record, then clicks once to make the document.
You can also use a status property named GeneratePDF. After the automation is set up, a user can select Ready to Generate on a record to start PDF creation. The generated file is returned to the database property set for the output.
PDFOutput supports several status choices for different document actions:
- Ready to Generate: Generates a PDF.
- Generate Page: Converts a Notion page to PDF.
- Generate PDF and Doc: Creates a PDF and Google Document.
- Generate E-Signed Doc: Generates an e-signed PDF in the Notion database.
- Preview: Creates a Google Document preview before PDF generation.
Some teams also want scheduled reporting. Don’t confuse a recurring review date with an automatic document trigger. Decide who will mark records ready and when, then check your setup before promising a hands-off schedule. A clear owner prevents reports from sitting in a draft state.
For cases that use several databases, connect the related records before mapping the template. An incident may link to a site, equipment item, or corrective-action record. Only include linked details that help a reader understand the event or act on it.
> 📌 Key Takeaway: A clear trigger tells staff when a report is ready to generate and gives the team a repeatable handoff.
Step 5: Test the Workflow, Then Automate Repeat Reports
Test one complete record before using the workflow for live incidents. Fill in the fields as a staff member would during a normal shift. Include a short event summary and a longer note so you can see how the template handles both.
Generate a preview first. Check that the event date is readable, names and locations appear in the right spots, and the timeline follows the order of events. Review the corrective actions, too. The owner and due date should be easy to find without searching through a block of text.
Look for data gaps and layout problems. If an empty field leaves a confusing blank, decide whether the field should be required or removed from the template. If a note runs across a page break, adjust the document layout and test again.
Once the preview looks right, activate the automation. Run a second test from the Notion database using the button or status property your staff will use. Confirm that the report returns to the right record and that the saved file opens as expected.
Then try a few different incident types. A near miss may need a potential consequence field. An equipment issue may need an asset ID and service status. A security event may need an access or system detail. Use separate templates or clearly named fields when one format can’t serve those cases cleanly.
For repeat reports, batch generation can help when the same document needs to be made for many records. PDFOutput supports batch PDFs, and it can work with multiple databases through relations and rollups. Check a sample output before processing a larger group, especially when related records provide information for the report.
Keep the investigation itself grounded in verified details. AI can help draft text from notes in workflows that include an AI writing tool, but a generated draft still needs review. Check dates, sequence, cause statements, and suggested actions against the source record before sharing the document.
An incident report generator should make the record easier to produce, find, and review. It can’t decide what happened or confirm that a corrective action worked. Keep those judgments with the people responsible for the investigation.
FAQ: Incident Report Generators in Notion
Can I generate incident reports from a Notion database?
Yes, you can generate reports from Notion database records by connecting the database to a document template. In PDFOutput, matching placeholders pull values from the record into the template. You can then use a database button or the GeneratePDF status property to start generation and return the output to the database.
What should an incident report include?
An incident report should record when and where the event happened, what occurred, and who was involved. Add the severity and immediate response when they matter to your process. For follow-up, include contributing factors, a root cause when established, and corrective actions with owners and due dates.
Can PDFOutput create a Word file or Google Doc as well as a PDF?
PDFOutput can generate PDFs and Google Docs, and it can produce PPTX files. Its templates can be Google Docs, Word files, PDF files, or Notion pages. Choose the file type and template that fit your review or sharing process, then test the output before using it for active records.
Does generating a report mean the investigation is complete?
No. Document generation fills a template with the values in your Notion record. Your team still needs to check the facts, decide whether the cause is known, and assign any needed actions. Use a review step before sharing a report that includes findings or decisions.
Conclusion: Put Incident Reporting on a Repeatable Notion Workflow
Build the Notion database around the facts your team needs, then map those fields to a report template in PDFOutput. Start with one test record, review the output, and set up the trigger your staff can follow. That small first run gives you a clear base for repeat reporting.